You are on your hands and knees on the cold kitchen tile, your right arm submerged up to the shoulder in the gloomy cavern of the corner cabinet. Your fingers brush against a forgotten plastic pitcher, sticky with an ancient layer of aerosolized cooking oil. The faint scent of stale cinnamon and pressed sawdust hangs in the air. This is the dreaded blind corner. It breathes in your pots, pans, and occasional Tupperware, and refuses to exhale them. You stretch a few more inches, muscle burning, wondering why modern home design allows for this dark, useless pocket of real estate that feels miles deep.
The Gravity of the Blind Corner
The prevailing industry myth insists that the only cure for a deep blind corner is a heavy, custom-engineered metal pull-out system. The kind of rig that costs hundreds of dollars and requires power tools, complex rail alignment, and a weekend of lost patience. But reclaimed space is not a problem of expensive mechanics. It is merely a problem of verticality. Think of your deep corner cabinet not as a horizontal cave to be dragged forward, but as an empty plot of land. You do not build outward; you build a high-rise.
Years ago, in a dusty workshop smelling of pine shavings and strong espresso, a veteran cabinetmaker named Luc showed me the reality of corner geometry. He was repairing a heavy oak centre island when I complained about my own kitchen’s black hole. He waved a calloused hand dismissively. People fight the cabinet, he grumbled, wiping wood glue from his thumb. They try to pull the back to the front. Just brace the void. He meant tension. Simple, aggressive, structural tension to conquer the dead air.
| Target Audience | Specific Benefits of the Tension Method |
|---|---|
| Renters | Zero drilling required. Leaves the cabinet interior completely pristine upon move-out. |
| Budget-Conscious Homeowners | Costs under forty dollars, entirely bypassing the steep markup of custom metal corner sleds. |
| Small-Space Condominium Dwellers | Maximizes vertical stacking, turning a chaotic single floor into structured multi-level storage. |
Building the Vertical Scaffold
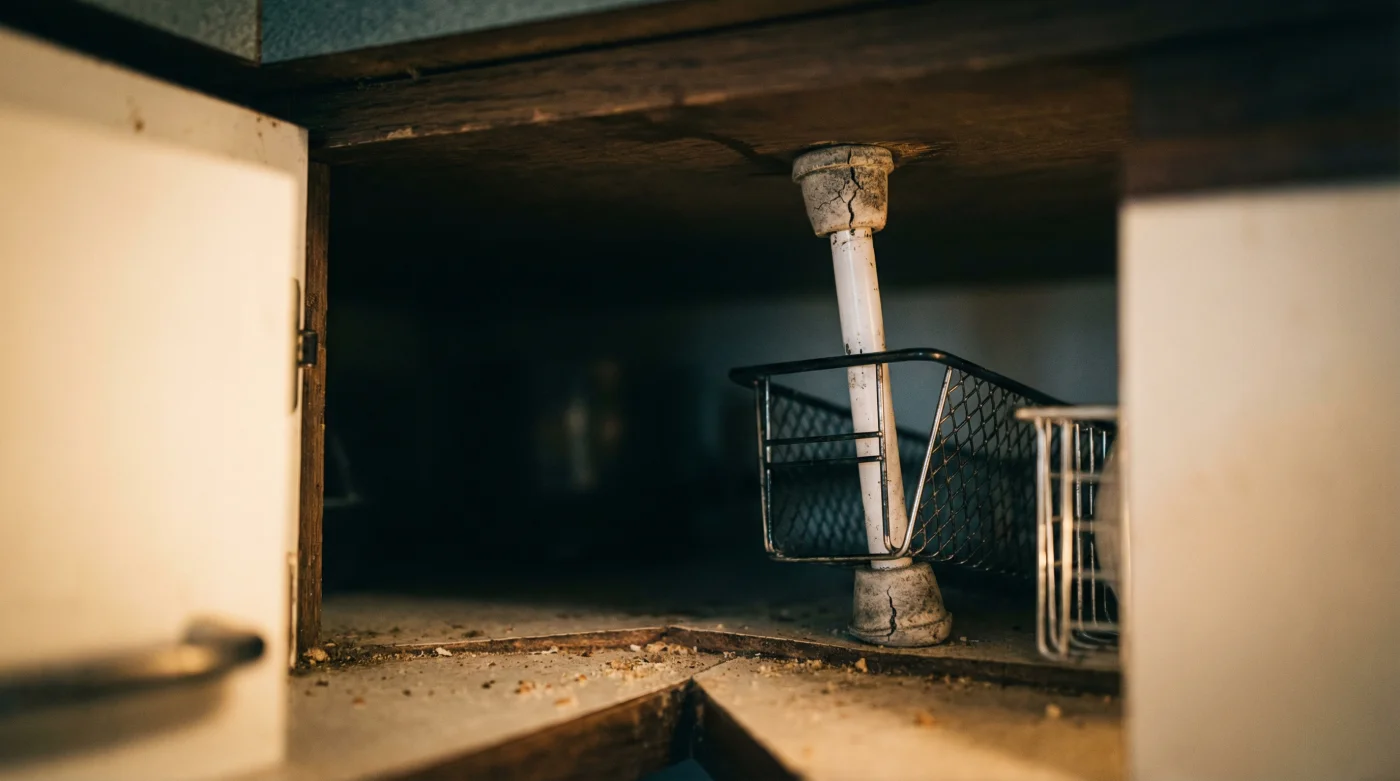
Here is the tactile reality of the fix. You need heavy-duty tension rods—the spring-loaded steel kind meant for window curtains—and a set of sturdy, squared-off wire or acrylic baskets. First, empty the cabinet entirely. Wipe away the dust and the ghost of spilled paprika. You are starting with a blank canvas.
Measure the vertical height from the interior floor to the ceiling of the cabinet. Twist the tension rods until they are firmly wedged, standing them straight up, floor to ceiling, in a staggered row at the back of the blind spot. You are creating a retaining wall of metal poles.
- Bathroom exhaust fans ignite ceiling insulation without this annual vacuuming routine.
- Landscaping river rocks cost pennies purchasing directly from local aggregate quarries.
- Popcorn ceilings hide completely beneath stretched canvas and temporary tension rods.
- Brass hardware restores perfectly using standard household tomato ketchup acid.
- Contaminated gasoline ruins winter snowblowers across Ontario rural storage sheds.
| Mechanical Factor | Scientific Data & Technical Specs |
|---|---|
| Internal Spring Tension | Requires a minimum of 15 lbs of outward radial force to prevent slipping under horizontal basket weight. |
| Rod Material Gauge | Optimal thickness is 1-inch diameter high-carbon steel to prevent bowing when items lean against it. |
| Friction Coefficient | Silicone-based rubber feet provide 40% more slip resistance against melamine cabinet walls than standard plastic. |
Now, slide the wire baskets behind and between the rods. The vertical poles act as steadfast retaining walls. You can stack bins on top of each other, resting securely against the tension bars. You have just turned a chaotic, two-dimensional floor into a four-story storage tower. Baskets can slide in and out of their designated slots smoothly, guided by the rods, without collapsing the tower.
| Component | What to Look For (Quality) | What to Avoid (Failure Points) |
|---|---|---|
| Tension Rods | Thick steel, internal locking mechanisms, wide silicone end caps. | Flimsy shower rods, smooth plastic ends, twist-only friction locks. |
| Storage Baskets | Rigid acrylic or thick powder-coated wire with flat, flush bottoms. | Wicker (snags easily), tapered bottoms that waste volume. |
| Placement Strategy | Placing the rods tightly enough to allow exactly one basket width between them. | Spacing them too far apart, causing baskets to twist and jam. |
A New Rhythm in the Kitchen
When you master this simple arrangement, the atmosphere of your kitchen shifts. It feels like miles of wasted, frustrating space have suddenly been reclaimed and brought into the light. You no longer dread putting away the heavy ceramic bowls or the bulk bags of flour. When you open the cabinet door, everything stands in ordered, visible columns, held firmly by the quiet strength of tension. The colour of your stored goods is visible at a glance. It brings a grounded, peaceful efficiency to your daily cooking routine.
A well-ordered space asks nothing of your memory; it simply presents what you need, exactly when you reach for it.
Frequently Asked Questions
Will the tension rods damage the top of my cabinet?
Not if you use rods with proper rubber or silicone feet. They distribute the pressure evenly without scratching or denting the melamine or wood finish.How much weight can the stacked baskets hold?
Because the baskets rest on the solid floor of the cabinet and stack upon each other, the rods only manage horizontal leaning weight. A well-braced stack can easily hold heavy bags of sugar, flour, and root vegetables.Do I need tools for this installation?
Zero tools are required. The entire mechanism relies on manual twisting to engage the internal springs of the rods.Can I use this trick for upper corner cabinets?
Absolutely. The physics remain exactly the same, making it perfect for organizing tall stacks of coffee mugs, spices, or baking extracts that usually get lost in the back.What if my cabinet has a fixed centre shelf?
Simply buy shorter tension rods. You will brace them from the cabinet floor to the underside of the shelf, and then from the top of the shelf to the cabinet ceiling, doubling your organizational zones.